Getting Started
In this chapter we discuss all steps for installing, configuring, and running BackupPC-Clone.
In this chapter we assume that the data directory of BackupPC is /var/lib/BackupPC and the data directory of
BackupPC-Clone is /var/lib/BackupPC-Clone and BackupPC is running under user backuppc.
The commands in section Installing BackupPC-Clone must be executed under root and all other commands under user backuppc.
Installing BackupPC-Clone
BackupPC-Clone can be installed using pip:
pip3 install BackupPC-Clone
Create the data directory of BackupPC-Clone:
mkdir /var/lib/BackupPC-Clone
chown backuppc.backuppc /var/lib/BackupPC-Clone
Configuring BackupPC-Clone
BackupPC-Clone requires configuration files in the data directory of BackupPC and in the data directory of BackupPC-Clone.
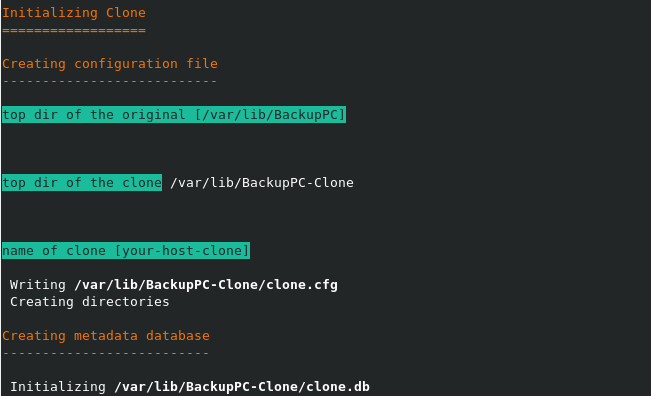
Create the configuration file of the “original” using the init-original command and provide the answers according to
the configuration of your BackupPC host:
backuppc-clone init-original
The output will look like:

The created configuration file looks like:
[BackupPC Clone]
role = original
name = your-host

[Original]
top_dir = /var/lib/BackupPC
conf_dir = /etc/BackupPC
log_dir = /var/log/backuppc
pc_dir = /var/lib/BackupPC/pc
Create the configuration file of the “clone” using the init-clone command and provide the answers according to
the configuration of your BackupPC host:
backuppc-clone init-clone
The created configuration file looks like:
[BackupPC Clone]
role = clone
name = your-host-clone

[Original]
config = /var/lib/BackupPC/original.cfg
name = your-host
If you are planning to create multiple clones use distinct names for the clones.
Cloning BackupPC
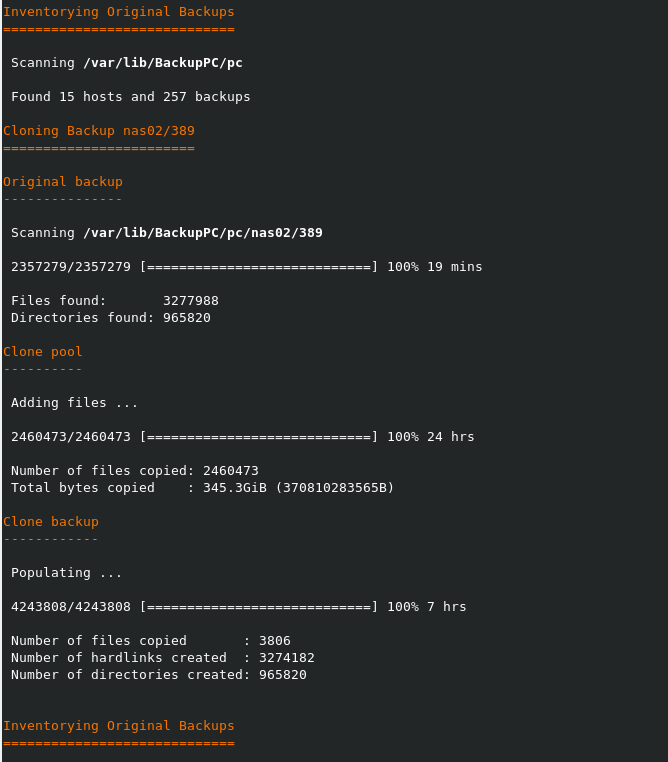
To create a complete clone of the data directory of BackupPC use the auto command:
nohup backuppc-clone --ansi auto -v /var/lib/BackupPC-Clone/clone/clone.cfg > auto.log 2>&1 &
The first part (the output will be repeated for each backup) of the output will look like (using a slow external hard disk):
Depending on the size and number of files in data directory of BackupPC and the speed of your hardware this command will
take some time to complete. Use the following command to monitor the progress of the auto command:
tail -f auto.log